Great American Backyard Campout

It’s Camping with the Kids Week

I hope you’ve enjoyed this weeks theme - Camping with the Kids. I’ve had a great time sharing lots of backyard camping ideas, recipes, and activities with you, all week long. If you missed any, here are a few of the exciting ways to get outside and enjoy the great outdoors with your kids.

Great American Backyard Campout

Join the fun this Saturday June 28th for the Great American Backyard Campout. If you can’t get outside this weekend, you can take the camping pledge by clicking here. This way you take the pledge to camp outside with your family sometime this summer. Trust me, it’s A LOT of fun!

Backyard Camping Ideas

Here’s a few more ideas to get outside and have some fun with your family.

Easy Indoor Smores Recipe

Here are a few of my favorite activities to enjoy with the kids

Click to download and Enjoy a Backyard Camping Scavenger Hunt

You can’t forget to sing some songs by the campfire or at least try to sing a few. Here’s a few I remember singing and the lyrics are fairly simple for kids to sing along and learn.

Duke of York

The grand old duke of York
He had ten thousand men
He marched them up to the top of the hill
And he marched them down again
And when they were up they were up
And when they were down they were down
And when they were only half-way up
They were neither up nor down!

This Land is Your Land


My Bonnie Lies Over the Ocean

Are you ready to join the movement and camp with your family this Saturday June 28th? It is The Great American Backyard Campout after-all. Grab a few of my ideas and your tent and I promise you and your kids will have a blast. We plan on getting outside and joining the fun this weekend, I hope you do too!

I can’t wait to see what fun you and your family have while backyard camping. Stop by and share some pictures with me on Facebook or Instagram.

Have fun out there in the great outdoors!

Backyard Camping Ideas for Kids

It’s Camping with the Kids Week

This is an exciting week at our house, as we have been enjoying our weekly theme - Camping with Kids. Let me tell you, this week is a BIG hit with the kiddos. Sometimes when you sit back and look at your kids and life you realize that children love the simple things in life, no frills. Camping with the Kids would fall into one of those great memories in the making.

Did you see yesterdays post showing you how to make Indoor Smores? If you missed it, make sure to check it out here or pin for later. It’s a super EASY Smores recipe - you make all from the comforts of your own home.

I grew up tent camping with my family usually in the woods or near a lake somewhere in California, so sharing the joy of the great outdoors and nature with my own kids is truly a great feeling. Who knew, pitching a tent in your own backyard could be so fun?…. Well, I’ll tell you it’s a great bonding experience for you and your kids.

First we set up the tent (well my hubby did) I did a fantastic job supervising, if you ask me. Next, the kids got their camping chairs out from the garage and put their sleeping bags inside our home away from home.

Backyard Camping Ideas for Kids

Then we let the good times roll…..

I got the kids involved and excited about our Scavenger Hunt.

Click to Download a free Camping Scavenger Hunt for Kids

After our scavenger hunt we played a good ol’ fashioned game of Tic Tac Toe.

Again, just some simple games but such a thrill for the kids, they didn’t even realize we were in our own backyard camping.

My son decided to use some of the rocks we found from our scavenger hunt and make some fun rock sculptures.

More sorting and using rocks from our backyard scavenger hunt game.

Next we made friendship bracelets. This reminded me of camp from when I was a girl. You know, staying at camp for a week, making crafts, and having a blast outdoors - such great memories. My daughter must’ve made like 5 bracelets, and necklaces. We used Creatology Pony Beads and Kids Braiding Cord to make the bracelets.

We got the backyard fire-pit lit and decided to grill up some hot-dogs for dinner. I did cheat and add some french fries from inside the house on this part (but otherwise we were outside camping).

With nice full bellies we were ready to play some Backyard Bingo. We used some great printables from My Insanity posting at ThirtyHandMadeDays. We used those rocks we found from the scavenger hunt.

Click here to view Backyard Bingo

Once the sun set and night settled in we enjoyed our campfire in our backyard. Luckily we have a fire-pit so this part was a whole lot of fun. The kids used glow sticks and flashlights to light the tent. From the smiles on the kids faces I knew that camping in the backyard was a huge success.

We couldn’t camp without making Smores. If you missed my last post on how to make Indoor Smores, you can check it out by clicking here. So easy, and a must-have for camping, at least for me.

Who knew, camping in your own backyard could be SO fun! Join the movement this Saturday June 28th for The Great American Backyard Campout. The kids are really loving the great outdoors, so we will definitely be outside camping in the backyard. With all these fun ideas, will you join the fun and pitch a tent in your backyard too?

I hope you and your family get a chance this summer to join The Great American Backyard Campout fun. It’s a hit with the kids and honestly with parents too! I love how you don’t have to spend a whole lot of money to make this a memorable camping experience for your kiddos.

Indoor Smores

It’s Camping with the Kids Week

With summer in full swing, I’m trying to keep the kids busy + learning while they are out of school. So, each week I’m featuring a new theme to make summer both educational while making great memories for the kids too. This week our theme is Camping with Kids.

Did you know, Saturday June 28th is the annual Great American Backyard Campout? It’s a great event that encourages families to get outside, enjoy the great outdoors either camping in your yard, or at a campground. Either way, it’s a great night to spend with your family and friends outdoors under the stars to be part of a national movement to help support programs that give back to our precious wildlife. Camping is a great way to teach kids to foster the love and appreciation of the great outdoors and nature.
Each day this week I’ll feature a fun activity that explores camping with the kids.
First on my list….. Making Smores. Not only is it super easy… and when I say easy, I’m not joking… it’s so simple and all done indoors. Yes, indoors… camping is done outside, but if you don’t have a fire-pit waiting in your backyard, then here’s a great way to get the kids involved during your backyard camping…Smores, of course.
Because, you just can’t camp without making Smores, here’s an easy way to make them.

Easy Indoor Smores

Ingredients:

Graham Crackers
Chocolate Bar
Large Marshmallows
Tin Foil
Sheet Pan

Here’s What To Do:

Layer your sheet pan with tin foil and heat your oven to the broil setting.
Have the kids break the graham crackers in half and lay them onto sheet pan.
Break your chocolate bar into squares
Top 1/2 the graham crackers with marshmallow. Top the other 1/2 with a chocolate piece.

Leave the graham crackers face open and place into the oven.

Warning: They cook QUICK! With the broiler setting, maybe less than 2 minutes.
Once you pull from the oven, put your Smores together like a sandwich and enjoy this yummy treat!

Now, making indoor smores may seem odd, but honestly they taste delicious with less mess, especially if you can’t get to a bbq or fire pit in your backyard. Plus, it’s so easy and the kids absolutely love it. As you can see my son had no problem enjoying his indoor Smores - he actually ate 2 of them, they are SO good.

If you want to join the movement and take the camping pledge, check out backyardcampout.org for even more ways to get outdoors and enjoy nature with your family.
I hope you get outside this week and maybe try camping in your backyard with the kids. We’ll be outside this weekend camping, will you?
Today’s indoor Smores was just our first stop in making a backyard campout a huge success.  My kids loved camping in the backyard and can’t wait to do it again this weekend, so stay tuned this week, I will show you even more fun activities, games, and ways to make your backyard camping a BIG hit with the whole family.

Handprint Mermaid Painting

It’s Under the Sea Week

We are in full swing with this weeks theme - Under the Sea. The kids and I are both enjoying our weekly theme so far. Not only have we made some really creative and colorful crafts, we went for a nature walk at the beach. My daughter even brought her notepad and took “notes” - for a 6 year old, I was pretty impressed. I’ve tried incorporating Sea Life into our week by reading books about water, beaches, sea life, and animals making this a super exciting week for us all!

Today we had a blast creating a Handprint Mermaid.
Our creative and colorful under-the-sea masterpiece is sure to be a big hit!

Supplies

White Construction Paper 11 x 14 size
Paint (assorted colors)
Paper plates or Tray (for paints)
Red Marker
Some children who don’t mind getting their hands a little messy

Instructions

Choose your mermaid hair color then add that paint color onto paper plate or tray. Dip your child’s hand in the paint and press onto paper where the head will be. Continue this step a few more times to get more hair. - Let dry at least 10 minutes.

Mix paints to get the skin color you want. Fingerprint circles to make the face directly below the hair. I covered the hair line a little to make the face larger.
Using the same paint color, fingerprint the neck, shoulders and arms. Let dry.

Flip your paper upside-down and have your child dip their whole hand into green paint. Starting at the edge of the body place their handprint down. This will form the mermaid body.

Ready to make the tail…..Press 3 fingers into green paint, place fingers facing downwards to make the tail. Repeat to make the other side of the tail. Let dry.
To make the scales on the mermaids body just fingerprint using blue paint - all the way down the body.

Add eyes by dipping your marker tip into white paint. Place the marker onto face where you want the eyes. Once dry add a dab of blue, green, or brown for inside eye color.

Fingerprint a red mouth, once dry use a red marker to finish up the sides. Add eyelashes using a marker.

If you want to add some colorful fish or jellyfish onto your Handprint Mermaid painting - pick your paint colors, then fingerprint a circle + use the side of your little finger to create tentacles for your jellyfish. Same idea for the fish.

This painting was a whole lot of fun to make, the hardest part is waiting for the paint to dry in between steps. Besides waiting for paint to dry this was a big hit with my daughter! She even drew a few mermaids of her own (which is fantastic because my drawing skills need a little help).
I hope your family has just as much fun creating your mermaid using their little fingers and hands. Painting a Handprint Mermaid really is a lot of fun and exciting to see it come to life on the paper.

If you liked todays craft, I have a few more ideas that I’m sure will inspire some Under the Sea creativity.

I’d love to see how your Under the Sea themed crafts come out.
Stop by and share on our Facebook or Instagram.
I love seeing what you create.

Thanks for stopping by and saying hello over here at Krafts and Kiddos.

CD Fish Craft

It’s Under the Sea Week

I hope you are enjoying our Under the Sea Week so far. Each day this week I will feature a fun Under the Sea related craft, activity, or book for you and your kids to enjoy to encourage the love of learning - all summer long.
Today we are making CD Fish using old or scratched cd’s and some basic supplies. It’s a great way to teach your child how to recycle and make a craft.

These colorful CD Fish can be hung up and reflect light near a window or used as a creative tabletop decoration.

CD Fish Craft

Supplies

1 - 8×11 Yellow construction paper
1 - CD (old or un-used)
Black Sharpie
Glue
Tape
Scissors
Markers (red, black, and orange)
1 - Googly eye
Honestly, we have so many old CD’s around the house, this was a great way to recycle some of those and inspire a fun activity for the kids.

Instructions

1) Have the kids draw scales on the back of your CD using a Sharpie. Fill in the whole CD to the circle in the center.

2) Add a Googly eye
3) Using your yellow construction paper - cut out the shapes for lips and fins. For the center fin make sure it’s long and narrow towards the center so you can insert into the center hole of the CD.

4) Using tape, apply the lips and fins to the back of the CD.

5) Now let their inner creativity shine by adding circles, lines, and shapes using colored markers.

Check back throughout the week for super exciting Under the Sea activities, crafts, and stories, that are all about Sea Life. It’s a perfect way to kick-start the summer!
If you missed yesterdays post, stop by here and check out the Seahorse craft we made using Cheerios.

Thanks for stopping by Krafts and Kiddos. I hope I was able to inspire some cool crafts with the kids this summer.

Seahorse Craft

It’s Under the Sea Week

I’m SO excited summer is here! I say that now.. check back in with me around August 1st and I might just sing another tune, but for now I’m content enjoying the freedom summer brings at our house. As much as I enjoy the days that we get to “sleep in” until a whopping 6:30am when the kiddos awake, I also continue to incorporate the love of learning at home, even during these fun-filled summer months.

So, this week I’m super excited to kick-off our first official week of summer with Under the Sea as our theme. Each week this summer I will feature a new theme with activities for the kids to go along with it.
Under the Sea seemed to be the perfect way to start summer off with some fun at home.

First, we decided to make this adorable, and easy Seahorse craft using Cheerios. This was a great activity for my son to help foster hand eye coordination and his counting skills. Plus, he got to eat Cheerios as we crafted - he was pretty much a happy camper, as I hope your child will be too!

Seahorse Craft

My son really loved practicing his counting, and I enjoyed seeing him work on his fine motor skills. Plus you can eat as you go, of course this was a lot of fun.

Supplies

8×11 - Blue paper
1 - Piece of paper (for the Seahorse body)
Scissors
Glue
Handful of Cheerios
1 - Googly eye

Miser Seahorse Book by Eric Carle

Mister Seahorse by Eric Carle is a great story we read to help inspire our craft. Such a fun story with lots of Seahorse pictures to inspire your inner artist.

Instructions

1) Using your white sheet of paper, trace a seahorse using Mister Seahorse book - there are lots of choices in this great book. Unless you can free-hand a seahorse, this is a great option.
2) Once your done, cut your Seahorse shape out.
3) Glue Seahorse shape onto your blue craft paper.

Next, add dots of glue all over Seahorses body + add 1 googly eye

Let the eating… I mean, the decorating your Seahorse begin. This may be the hardest part - just to keep your child from eating all their Cheerios before they actually place them on top of each dab of glue. My son had a blast with this, eating, adding to Seahorse, then eating some more, and adding Cheerios to his Seahorse.

This was so much fun to make - Snack + Craft all in one, it was a win/win.

I hope you you enjoy Under the Sea Week! Check back throughout the week for super exciting Under the Sea activities, crafts, and stories, that are all about Sea Life.
Thanks for stopping by Krafts and Kiddos.

Fathers Day Coffee Mugs

Mugs for Fathers Day

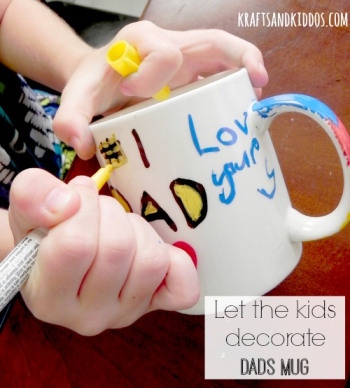
Not every dad is a coffee drinker, but he can still enjoy a cup of hot cocoa, cider, or tea from a special Fathers Day coffee mug made by who else….his kiddos. I know I’d be beyond thrilled to receive a cool mug with my name plastered across it with handprints or love notes from my kids. Of course, any dad or grandpa will love this decorated coffee mug.

If you have a child Picasso in your home, let them break out their drawing or writing skills and see what they create. If you have someone more like my son, who needs a little guidance to decorate the mug - this can still be hands-on fun for the whole family. I just helped my son along with the spelling, otherwise my kids did all the decorating.

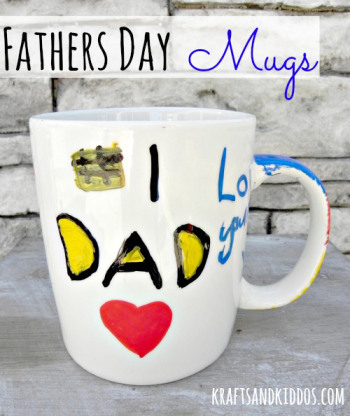
Here’s what the kiddos came up with

Fathers Day Coffee Mug

The trick to this project: use OIL BASED Sharpies. If you use regular paint or sharpies it will come right off with water. These wonderful, and yes I mean wonderful oil based sharpies - are super terrific for decorating mugs.

Fathers day coffee mug

Once you have blank mugs of any size + your oil based sharpies you are ready to rock and roll and get the kids decorating.

Did I mention how easy decorating these mugs for a gift would be, it’s super simple. I will mention, you do have to really shake these pens up, to get the ink pumping through. Shake em’ up, a lot! This will do the trick.

Supplies

Blank mugs (I found ours for $1.00 at Michaels craft store)

Oil based Sharpies

Fathers day coffee mug

As you can see my kids had a blast decorating their Fathers Day coffee mugs. The pen dries pretty quickly, which is nice with busy kid-hands, but a warning - if you have any wetness on your hands dry it up first. Decorating your mugs is best done with completely dry hands - otherwise it’s tough to fix any boo-boos. My thoughts on that, if their hands are dry then let the Picasso shine through with this project, and show Dad their creative side.

Fathers day coffee mugs

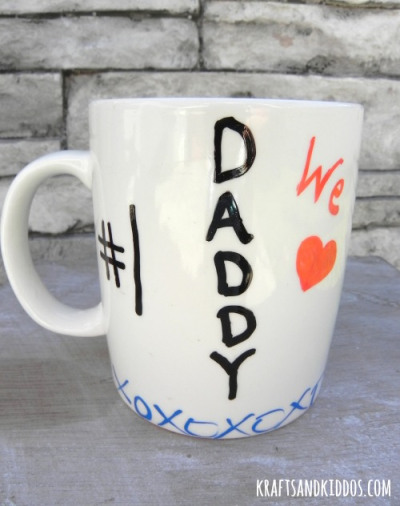
So here is what dad will be getting this Fathers Day. The kids and I are super excited to give it to him. It’s a simple craft for the kids to enjoy and it doesn’t break the piggy-bank either.

Fathers day coffee mug

If you’re still unsure what to give Dad this Fathers Day take a look at some of the other ideas I have. We’ve been busy making all kinds of goodies for Dad, I know there will be something to inspire you.

More Fathers Day Gift Ideas

Decorate picture frames for Dad

Grab the kids, props, and your camera for this Fathers Day photo inspiration

Wishing you and your family a very Happy Fathers Day!

Decorate a Watering Can

Having fun decorating a watering can

With summer pretty much upon us I’ve been out in our backyard gardening with the kids, planting seeds - our pumpkin seeds have sprouted and oh-boy are we going to have a BIG pumpkin garden this year. If you have never tried planting pumpkin seeds it’s honestly one of the easiest to plant and to grow. Make sure you have plenty of garden space for them, because let me tell you - they expand like you wouldn’t believe. Just till your soil and then add a layer of mulch, dig at least 10 - 12 areas that are 3-4 inches deep in the soil, and then add your seeds (3-4 in each hole), cover back with soil. Then water, just make sure to check your soil and keep it fed with lots of H20. Within a week or two you should see your little sprouts pop out to say hello.

One of my problems with our yard is that it’s divided into large sections where I can’t always reach with a garden hose. Does that ever happen to you? I hate for my plants to wilt and look so sad, so I rely on watering cans a lot.  We happened to be at one of my favorite places… Target, and found these wonderful orange and yellow watering cans in their dollar bins, score! I was so excited to use them. I got one for my son and one for my daughter.

The only thing missing from these watering cans was some cute decorations. My daughter helped me pick which stencils we wanted to use and we were on our way.

Let’s Decorate your Watering Can

Here’s what we started with, our 2 watering cans - pretty plain, they were screaming out to please decorate me. Don’t you think?

Decorate a watering can

Supplies needed to decorate your watering can

Watering Cans - I found these at Target in dollar bins

Stencils - I used Folkart Painting Stencil

Black acrylic paint 

Sponge brush

Tape

Next we grabbed our stencils and lightly taped the sides in place on top of the watering can.

Decorate a watering can

Now we were ready to paint. Doesn’t this poor can need some love?

Decorate a watering can

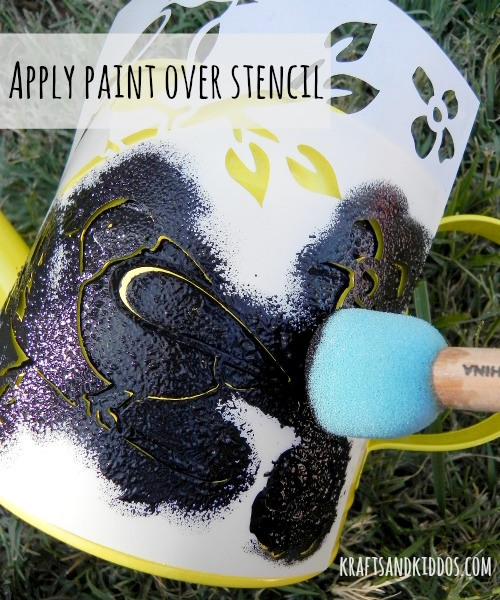
Next we were ready to paint. Grabbed our black paint and sponge brush and covered the stencil.

how-to-stencil-watering-cans

Next, place your stencil out to dry. I waited about 20-30 minutes to be safe. Remove the tape and re-use stencil if you have other cans to decorate.

decorate a watering can

Once the last watering can was dry I removed the stencil and here is how they looked.

decorate a watering can

So the next time you’re at your dollar store or at Target and see those glorious bins filled with goodies, make sure to pick up a few watering cans. Once you get home you can transform your cans into a whole new look. We liked bird stencils, but you could also have your kids stencil their names onto the cans or try using different paint colors. There are all sorts of fun stencils to choose from.

Are you ready to get out and enjoy your garden with some fun watering cans? The weather is getting nicer this is the perfect afternoon craft.

Picasso Flower Art

Picasso Flower Art with 1st Graders

The classic Picasso Flowers painting seems to be such an amazing piece of artwork for all ages.

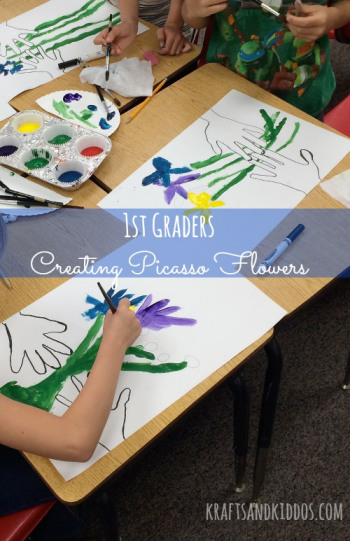
I have the lucky opportunity to teach Arts to my daughters first grade class once a month. For our last project of the year before these kids become second graders (tear, tear…. can’t believe they will be 2nd graders in the fall) I decided we’d re-create Picasso Flower Art from a child’s perspective.

I’ve seen so many variations of this beautiful art I wanted to let these amazing and talented first graders be creative by giving them a canvas, an idea, and letting them create!

Picasso Flower Art

These first graders are so amazing! I’m always so proud after teaching them - I love seeing what they come up with from the lesson.

Supplies:

1 - 12×18 sheet of white paper

Pencil

Black Marker

Assorted Paint Colors

Paint Brush

To start, I had each child trace their hands with pencil.

Making Picasso Flowers

Using a pencil I had the kids begin drawing the stems up through the center of the page, then draw the flowers attached at the top of each stem. Once they finished with the pencil we re-traced our hands using the black marker.

Then we began to PAINT!!!

This is always the fun part.

Making Picasso Flowers

This project was perfect for the kids of all levels. To help the kids I placed flowers in a vase to give them some ideas of what different flowers are shaped like, the different colors, and textures. A little inspiration never hurt, right. Here’s one of their final masterpieces. Picasso Flower Art.

Picasso Flowers

I hope our project inspires you to find the Picasso in your child.